Setting a Theme in Policy & Procedure Management
You can customize various aspects of the Policy & Procedure Management application, including the color scheme, logo, and custom banner to set a theme for your individual organization.
Important: If your organization uses the NAVEXOne Platform, you can manage these settings in the Theme Manager tab under the Admin Settings of NAVEXOne. See Configuring Theme Manager for more information.
Customizing the color scheme
You can customize the Policy & Procedure Management user interface color scheme.
-
Click Settings & Tools > IT Settings, and then click Theme Manager.
-
On the Color Scheme tab, do any of the following:
-
For Theme, select Dark or Light. This setting changes the background color of the left navigation panel and the header above the main display pane.
-
In the Accent Color Options pane, for Accent Background, click
 , and then select in the color selector or type an RGB or hexadecimal color code. This setting changes the background color of the logo area in the upper left corner and the "selected" indicator bar in the sidebar menu.
 -
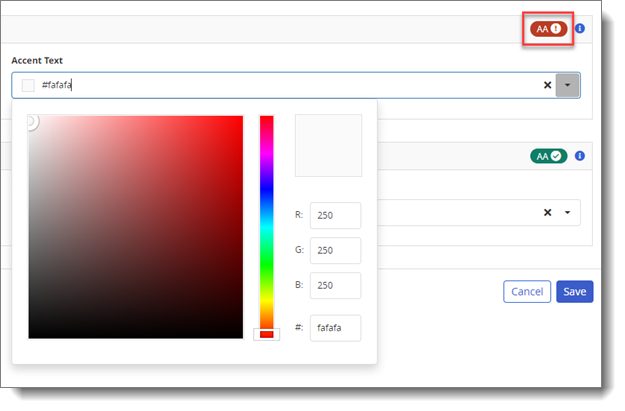
For Accent Text, click
, and then select in the color selector or type an RGB or hexadecimal color code. This setting changes the color of the Toggle Sidebar icon.
-
In the Primary Button Color Options pane, for Accent Background and Accent Text, click
, and then select in the color selector or type an RGB or hexadecimal color code. These setting change the action buttons (such as Save in the Color Scheme tab) throughout the application.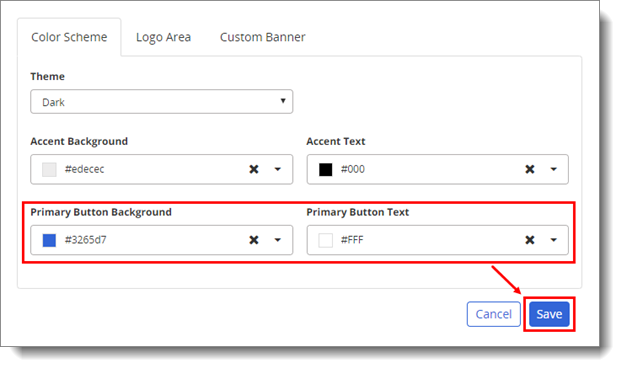
-
-
The Accent Color Options and Primary Button Color Options should be set to colors that have enough contrast to ensure legibility. An icon indicates if the color settings do not have proper contrast. Continue to adjust the color settings for each option until the icon changes from a red explanation mark to a green check mark. For more information about Web Content Accessibility Guidelines (WCAG), see the W3C Web Accessibility website.
-
Click Save. The changes are made when you click Save.
Customizing the logo area
You can customize the Policy & Procedure Management user interface logo area.
Important: For best results, create an icon image that is exactly 24 by 24 pixels in size. If the image file you select is a different size, it will be reduced or enlarged to fit in the 24 by 24 pixel area.
-
Click Settings & Tools > IT Settings, and then click Theme Manager.
-
Click the Logo Area tab, and then do any of the following:
-
Clear the Enable Logo Area check box to hide the logo area. This setting removes any logo from the upper left corner of the application.
-
Select the Enable Custom Logo check box to add a custom logo. In the Custom Logo area, click
 , and then click Browse. Find and select the graphic file to display in the application. This setting is available only when you enable the Enable Logo Area option.
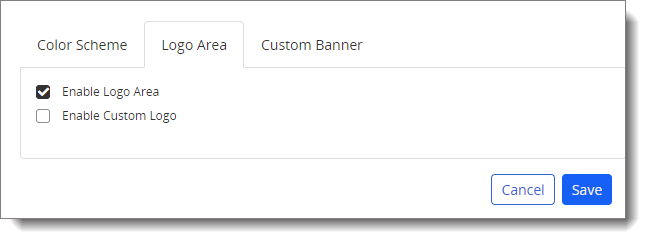
-
-
Click Save
Customizing the banner
You can enable and customize the Policy & Procedure Management user interface banner.
-
Click Settings & Tools > IT Settings, and then click Theme Manager.
-
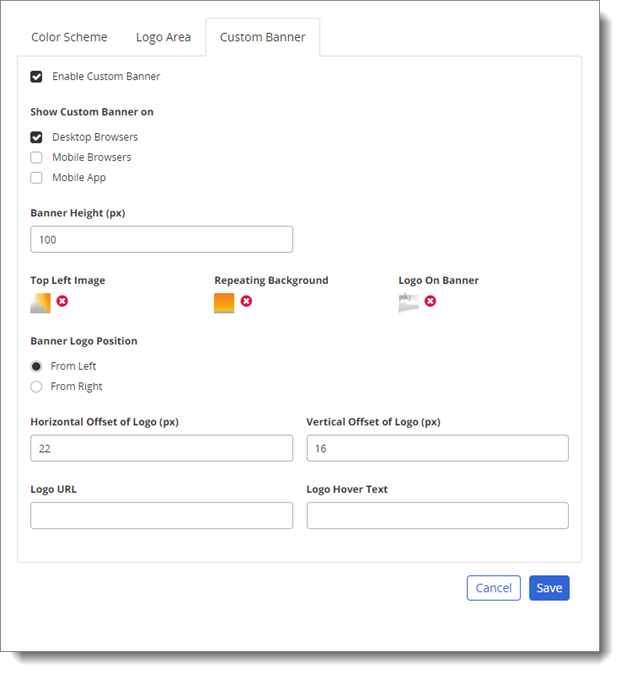
Click the Custom Banner tab, and then select the Enable Custom Banner check box.
-
For Show Custom Banner on, select where you want the banner to appear.
-
For Banner Height, type the number of pixels.
-
Changing the default setting (100 pixels) simply changes the size of the frame that contains the banner images; it does not change the size of the banner images themselves. The banner height should typically be the same as the height of the top left and repeating background images.
-
The banner is comprised of three images—Top Left Image, Repeating Background, and Logo On Banner—as shown in the screenshot below. To change a banner image, click
to display the Browse button. Click Browse. Find and select a graphic image file.
Note: The Repeating Background image is duplicated to fill space on the right as the browser window is widened.
-
-
For Banner Logo Position, select where to place the logo From Left or From Right.
-
For Horizontal Offset of Logo, and Vertical Offset of Logo type in pixels precisely where to position the logo image in relation to the banner's top and left edges or top and right edges.
-
For Logo URL and Logo Hover Text, type a valid URL and hover text for the URL, to make the logo image a link to a website.
-
Click Save.
This publication was written and produced at NAVEX Global, Inc., Lake Oswego, Oregon. This publication or any portion thereof is confidential and/or proprietary and may not be reproduced or used in any manner whatsoever without the express written permission of NAVEX Global, Inc.
Copyright © 2025 NAVEX Global, Inc. NAVEX Global® is a registered trademark/service mark of NAVEX Global, Inc. The NAVEX Global® logo is a trademark/service mark of NAVEX Global, Inc. Unauthorized use of NAVEX Global, Inc.’s trademarks/service marks is strictly prohibited without prior written permission from NAVEX Global, Inc.